Hello there gamebook fans! Welcome to my first post of 2016, apologies that I have not posted for a few months but hopefully this will be the first of more regular articles.
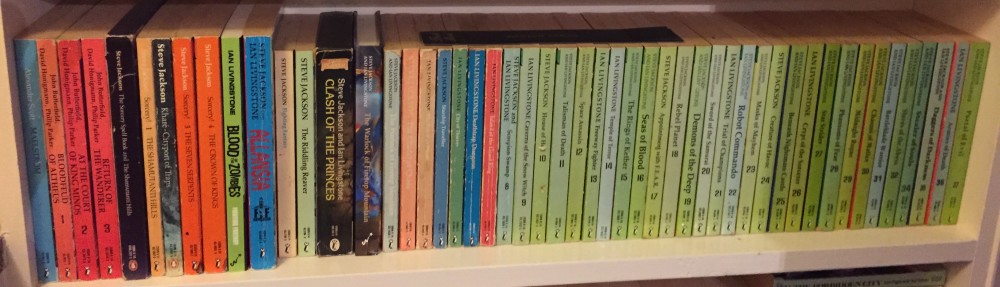
First up is a play-through of Steve Jackson’s Sorcery! gamebook series which I first wrote up a number of years ago. Out of all the Fighting Fantasy series of books the four Sorcery! books are my absolute favourites. I loved the fact that these books were slightly more advanced than the normal gamebook with the addition of a comprehensive magic system with a spell book that you needed to memorise before starting and also that all four books made up one epic quest.

I am unsure if this is the optimum route for this series but what follows is a culmination of playing these books over many years. Needless to say the following play-through contains many, many spoilers!! so if you have not played through these books and don’t want to know what happens then please stop reading now.
BOOK 1 – THE SHAMUTANTI HILLS

Initial Skill = 9
Initial Stamina = 24
Initial Luck = 12
Equipment = Sword and Backpack
Gold = 20
Provisions = 2
DAY 1
1 You leave the Outpost Settlement. Your quest has begun!!
178 Arrive at the village of Cantopani. Tell the man that you are a trader.
264 Buy the Axe (141), Pipe (22) and the herbalist’s potion (107).
141 Buy the Axe 7 Gold Pieces (13).
280 Next buy the pipe.
22 The pipe costs (1-6 Gold Pieces) 3 Gold Pieces (10).
280 Finally buy the herbalist potion.
107 Potion costs 4 Gold Pieces (6).
280 Cannot look at anymore artefacts.
91 Leave the Merchants.
126 Investigate the Axe (72), Pipe (249) and Potion (274).
72 The axe has carvings and message which reads ‘This axe was crafted in the year of the Ox by Glandgrador the protector. Its powers may only be realised by its owner’. It also has the number 233 carved into it.
249 The pipe is made out of Bamboo.
274 Potion is Blimberry Juice. Can be used before battle to restore 3 Stamina or can be used as a spell artefact.
95 Leave Cantopani and you are ambushed by two Bandits. Do not hand over your backpack.
104 Cast the JIG spell.
308 Deduct 1 Stamina point (23). The bandits dance away allowing you to continue your journey.
131 Continue along the path leaving the village and reach a fork.
183 You see an old man in the tree; he tells you the following rhyme. ‘See him though he sees you not; the black-eyed creature creeps. A guardian once but now his lot; the key to freedom keeps.’ He also gives you a page from a spell book (page 102). Investigate the buzzing around the tree.
200 You see a beehive, investigate it.
270 Lose 3 Stamina from Bee stings (20), take the Beeswax and enough honey for 1 provision (3).
9 Continue by going into the valley.
164 Follow the path along the West side of the stream; do not eat any provisions here.
65 Continue along the valley. Find a place to camp.
76 Bed down and eat a provision (2), add 2 Stamina points (22). You spot the Elvins, sit tight and hope that they don’t see you.
281 Test your luck, rolled 9 (11). They do not spot you and can leave the camp at sunrise.
DAY 2
148 You set off and soon encounter a rope bridge. Continue along the path.
209 Continue along the river path, you come across a village. Leave the path and avoid it.
156 Head on into the grasses around the village. Something grabs your arm, prepare to defend yourself.
241 Decide to cast a spell.
275 You face a Serpent. Cast the LAW spell.
355 Deduct 4 Stamina points (18), you command the Serpent to go away.
137 Continue through the bush until you reach waist high grassland.
105 Follow the path made in the high grass.
57 You find a sack with 12 Gold Pieces (18). However you lose one item of equipment to the Pilfer Grass. Lose the Beeswax.
159 Further along you find a Locket. You have avoided the village.
231 You find a bridge and cross but are ambushed by Elvins hiding in a tree. Cast the WOK spell.
296 Deduct 1 Stamina point (17) and lose 1 Gold Piece (17). The shield protects you from the acorns that the Elvins throw at you.
7 Continue along the path until you reach a hill village.
28 Walk into the centre of the village and find the ale house.
266 The owner tells you that you are in the village of Kristatanti. Buy a mug of ale for 1 Gold Piece (16) and sit down next to the old man.
192 He tells you that one exit from the village goes to Alianna’s house and the other heads towards Lea-Ki domain of the great ones. He gives you a Bomba Apple (Double gain in Stamina points when eaten with a meal).
211 The inn costs 3 Gold Pieces for the night and 2 Gold Pieces for food. Pay for the food and the room (11).
161 Add 3 Stamina points for the food (20) and add 5 Stamina points for the sleep (24).
DAY 3
45 Leave Kristatanti by choosing either 125 or 226.
226 See the blind beggar and give him a Gold Piece (10).
244 The beggar gives you a Copper Key with the number 206 stamped on it. The beggar also tells you to beware of the Red-Eyes in Kharé.
58 Follow the path and choose head west.
10 You reach the woods and you see a signpost that leads west to Alianna. Follow this path.
150 You reach another signpost which says west to Alianna and straight on to Dhumpus. Take the west path.
154 You find a house which you enter.
119 Alianna is locked in a cage. Ask her what is in it for you if you release her.
78 She says that she will give you help for your journey. Ask for help with your spells.
17 She agrees to give you three spell artefacts. Try to free her.
4 Cast the DOP spell on the cage.
409 Deduct 2 Stamina points (22). The lock opens, and you ask for help with your spells.
248 She gives you a vial of glue, nose plugs and four pebbles.
87 She also gives you a bag containing 7 Gold Pieces (17). Alianna then casts a spell on a chair and turns it into a Wood Golem. Cast the HOT spell.
297 Deduct 4 Stamina points (18). The fireball burns the Wood Golem down.
169 You leave Alianna’s house and head north towards Dhumpus.
54 The path heads towards Dhumpus.
176 You arrive at the village of Dhumpus; head straight for the inn.
134 The inn charges 3 Gold Pieces for a meal and 3 Gold Pieces for a room. Buy both (11). The meal restores 3 Stamina points (21).
115 Add 2 Stamina points for a good night’s rest.
DAY 4
30 You leave Dhumpus.
208 Leave the village along two paths, one leads into the hills and the other goes downhill into a wood. Take the downhill route.
127 Follow the path, do not eat provisions. You encounter a rope bridge.
27 Vancass the hunch-back guards the bridge. You must answer the two questions that he asks in order to cross the bridge.
41 The first question.
‘A witch held in captivity
Lives in the woods. First tell me
If you know of this cunning dame
How is she known; what is her name?’
The correct answer being Alianna.
143 The second question.
‘Your answer is correct and true
Now answer question two
Through three villages you have passed
What was the first, second and last?’
The correct answer is Cantopani, Kristatanti and Dhumpus.
262 Vancass allows you to cross the bridge and says “Beware the lair of the Cave-Demons maze. For traps as deadly as Medusa’s gaze greet travellers who, of luck bereft, take passageways only to the left.” Add 2 Luck points (12).
220 Approaching a large village. A small creature tries to be friendly. Cast the SIX spell to get rid of it.
387 Deduct 2 Stamina points (21). Nothing happens! You cannot use magic whilst the creature is around.
171 The creature is a Minnimite called Jann. He tells you that you are about to approach the village of Birritanti which is the largest village in the Shamutanti Hills. Allow Jann to stay with you.
111 Head for the tavern first.
230 The tavern’s proprietor is Glandragor. Tell him that you have something for him.
182 Give him the carved axe. Turn to 233.
233 Glandragor is delighted to be reunited with his axe and gives you a free mug of ale; add 2 Stamina points (23). He also gives you a free pass for the Crystal Waterfall (you do not need to pay). In Kharé, he tells you to look out for his friend Vik who will help you. In Kharé look for a spell option of VIK to seek his advice. Now head for the waterfall. Add 3 Luck points (12).
102 Head for the waterfall.
204 Use your pass to gain entry (you do not have to pay). The waterfall restores your Skill, Stamina and Luck scores to their initial values (9, 24 and 12). Finally head for the inn.
92 The inn is expensive; it charges 5 Gold Pieces for a meal and 4 Gold Pieces for a room. Buy both (2). Add 2 Stamina for the food (24).
55 Add 3 Stamina points for the night’s rest (24).
DAY 5
67 You leave the village of Birritanti and then see two paths ahead. One is uphill to the east and the other is downhill to the west. Take the western path.
51 Travel downhill, Jann is becoming irritating. You are ambushed by a man dressed in black. Do not cast a spell but prepare for battle.
117 The Assassin attacks (Skill 8, Stamina 6). Spare his life when he is reduced to 3 Stamina points or less.
Round 1
Assassin (15) Stamina 4
Me (16) Stamina 24
Round 2
Assassin (12) Stamina 2
Me (18) Stamina 24
187 He begs for mercy. His name is Flanker an assassin. He agrees to help you once you are in Kharé. Turn to 79 in the next book for instructions. Add 2 Luck points (12).
212 You are annoyed by Jann’s constant chattering. You see a hut, the woman invites you in. She what she wants.
243 The woman welcomes you and makes a cup of tea for both you and Jann. Drink the cup of tea that she has given you.
146 Add 1 Stamina point (24) and also add 1 Luck point for making the right choice (12). She asks if you have encountered an old man with a page from her spell book. Tell her that you have the spell book page.
184 She takes the page from you.
114 The spell is a pest repelling spell and she will cast it for you to get rid of the annoying Jann the Minnimite. Add together page 102 with page 103 and turn to 205.
205 The Minnimite disappears. You can now use your magic again. Leave the hut and continue along the path.
232 The path leads to the village of Torrepani. It is inhabited by the Svinns. Make contact with the villagers.
282 They tell you that the chief’s daughter has been captured by marauders and offered as sacrifice to a powerful cave demon. They then capture you and march you off to a hut at the end of the village.
71 Eat a provision (1) and add 2 Stamina points (24). Bed down and sleep for the night.
DAY 6
109 Add 2 Stamina points for your rest (24).
222 You are taken to the Village’s chief Proseus. He gives you a meal; add 2 Stamina points (24). The chief asks you to rescue his daughter who has been taken prisoner by a powerful cave demon. Agree to help him out.
100 You are taken to the caves and are lowered down.
197 It is dark; the Svinns throw down a torch and tinderbox to light the way. Take the left passage.
16 The passage slopes down and you reach another fork. Take the left passage again.
151 You find the Svinn girl.
195 The Manticore appears. It collapses the tunnel sealing off your escape. Cast the FOF spell.
415 Deduct 4 Stamina points (20). Its tail hits your force-field and does no damage. Now to cast an attacking spell.
364 Cast the HOT spell.
346 Deduct 4 Stamina points (16). The fireball hits the Manticore and it roars out in pain. Now to finish it off.
420 Cast the WAL spell.
447 Deduct 4 Stamina points (12). The Manticore leaps at you and hits your invisible wall. You can then fence it in securely allowing you to escape.
456 You return to the Svinn village of Torrepani. The healing priest restores your Skill, Stamina and Luck scores to their initial levels (9, 24 and 12). The chief hands you a pouch which contains 10 Gold Pieces (12). Hel also gives you a key to the South Gate of the city of Kharé. To use the key turn to 12 in book two to open the gate. You spend the rest of the day in the village and stay the night. Increase your initial Luck score by 1 point and raise your Luck to this level (13).
BOOK 2 – KHARÉ CITYPORT OF TRAPS

Initial Skill = 9 (Current Skill = 9)
Initial Stamina = 24 (Current Stamina = 24)
Initial Luck = 13 (Current Luck = 13)
Equipment = Sword, Backpack, Locket, Copper Key: 206, Key to Kharé: 12, Bamboo Pipe, Blimberry Juice, Vial of Glue, Nose Plugs, 4 Pebbles and Bomba Apple.
Gold = 12
Provisions = 1
DAY 7
79 Flanker the assassin arrived a day ahead of you. When you arrive at section 244 turn to 111. When you arrive at 110 turn to 222.
1 You leave the Shamutanti Hills and reach the South Gate of Kharé. Use the key given to you by the Svinn chief and turn to 12.
12 The key opens the gate but you leave it in the lock and lose it. Enter the nearby building and greet the man inside.
169 You open the door and are then shoved inside and the door locked behind you.
254 Talk to the prisoner who tells you that in order to pass through the North Gate you must acquire the four spell lines in order to open the gate and leave the city. He knows that one of the spell lines is held by a scholar. Cast the DOP spell to open the cell doors.
432 Deduct 2 Stamina points (22). You open the door and leave the cells.
81 You reach a junction where you can head left, right or straight on. Take the left path.
23 You dart into a hut which is filled with Black Elves smoking weed. Ask them for information.
242 The Black Elves do not know much, they know that the scholar lives just down the road. You decide to leave them to it.
213 You find a pond. Ignore this and continue on your way.
28 A fork is up ahead where you can continue ahead, go left or check out the horse tied up. Continue ahead.
233 You come across a Dwarf community. Stop off at the general store and buy 1 provision (2) for 3 Gold Pieces (9).
199 Did not buy the gauntlets.
272 Did not buy the dust.
259 Did not buy the Potion of Mystery.
170 Follow the road ahead; do not watch the fight in the street.
153 You come across a thatched hut and a statue outside. Ignore the statue and enter the hut.
27 Inside the hut are 15 Gold Pieces (24) and a Bone Bracelet.
37 The statue comes alive; it is in fact a Mantis Man. Decide to cast the LAW spell.
461 Deduct 4 Stamina points (18). You order the Mantis Man to hand over the golden locket around its neck.
117 The golden locket is worth 8 Gold Pieces. Inside the locket is a Sun Jewel. Add 1 Luck point for surviving the encounter (13).
137 You carry on Northwards.
191 You reach a junction ahead where you can go ahead or to the right. Take the right hand junction.
84 You come to another junction where you can go left or carry straight on. Go straight on.
322 You hear voices of a large crowd ahead; continue on to follow its direction.
244 Arrive at the festival. Turn to 111 to meet Flanker the Assassin.
111 You meet Flanker. He agrees to take you to Lortag the Scholar who knows one of the North Gate spell lines.
140 You are at the front door. When Lortag answers the door you must give him your weapon before he allows you inside his house.
229 You hand him your weapon and follow him into his study.
336 Lortag is having difficulty in solving a problem and asks for your help. He promises to give you one of the North Gate spell lines if you can help him solve his problem. Choose the page with one mark on it. Turn to 274.
274 This is the correct answer. As promised he gives you one of the spell lines.
‘So tumblers two sealed deep inside.’
He also gives you a Green Wig. You retrieve your weapon and leave the scholar’s house. Restore Luck score to initial level (13).
133 Further down the street you come to a tradesman’s area. Stop and have a look.
3 Go and have a look at the fireman’s fires.
96 You check out the fires. He asks if you would like to look at his special fires inside his shop. Check them out.
108 There is a chest inside the shop under a blue coloured fire around it. Cast the MAG spell to protect you from the fire’s effects.
453 Deduct 2 Stamina points (16). Inside the chest are 10 Gold Pieces (34) and a Gold-Backed Mirror. You leave the shop and continue onwards.
137 You decide to carry on Northwards.
191 You encounter a junction where you can go straight ahead or to the right. Choose the right hand junction.
84 Yet another junction where you can go left or straight ahead. Go straight on.
322 You encounter the sounds of the festival again. Head towards it.
244 Back at the festival. Check out the champion contest.
33 Lay a bet on the first champion contest between the Anvar the Barbarian and Skullsplitter the Ogre.
190 The odds are 3/1 on the Barbarian and 1/3 on the Ogre. I decide to bet 30 Gold Pieces on the Ogre at 1/3.
234 The Barbarian (Skill 7, Stamina 8) fights the Ogre (Skill 9, Stamina 12).
Round 1
Barbarian (15) Stamina 6
Ogre (18) Stamina 12
Round 2
Barbarian (14) Stamina 4
Ogre (18) Stamina 12
Round 3
Barbarian (9) Stamina 2
Ogre (16) Stamina 12
Round 4
Barbarian (11) Stamina 2
Ogre (11) Stamina 12
Round 5
Barbarian (12) Stamina 0
Ogre (18) Stamina 12
I claim 10 Gold Pieces after the fight plus my stake money (44).
136 You can now decide to challenge the champion.
82 Your challenge is accepted. Cast the VIK spell option.
362 I was not expecting this to be a spell.
436 You meet Vik in the crowd and he tells you that you will talk after the fight. Add 2 Luck points (13). Turn to 352 after the fight.
82 Do not cast a spell. You fight the Ogre (Skill 9, Stamina 12).
Round 1
Ogre (17) Stamina 12
Me (17) Stamina 16
Round 2
Ogre (13) Stamina 8 – Tested Luck (12)
Me (16) Stamina 16
Round 3
Ogre (14) Stamina 4 – Tested Luck (11)
Me (17) Stamina 16
Round 4
Ogre (20) Stamina 4
Me (20) Stamina 16
Round 5
Ogre (13) Stamina 0 – Tested Luck (10)
Me (20) Stamina 16
I win the fight and claim the prize of 15 Gold Pieces (59). Turn to 352 to talk to Vik.
352 Vik tells you that one of the North Gate spell lines is known by a priest. He says that to find the priest take the first left, then take either the first or second right. He is not sure which the correct street to take is.
263 You leave the festival and approach the Cabinets of Fortune.
240 Try your luck in the Cabinets of Fortune; it costs 2 Gold Pieces (57).
318 Test your luck to improve the chances of getting something valuable. I rolled 2 (9). I can now choose an option. Choose number 4.
92 You receive some throwing darts. Before battle you can throw a dart. You must roll under your Skill score on two dice to succeed. If you hit the dart does 2 Stamina points damage to the enemy before combat begins. You have two darts.
160 You are now nearing the centre of Kharé. Take the left path at the next junction
202 At another junction, take the right hand path.
139 You pass a small chapel. Check it out.
187 You see a holy man talking to a crowd of people. Take up his challenge to answer his question correctly.
156 If you fail the challenge then you must renounce your goddess Libra.
301 The question is “Bigfoot has six sons. He divides his wealth equally among his sons. 5 Gold Pieces goes to his second youngest son, 13 to the eldest and 9 to the fourth youngest. How many Gold Pieces does Bigfoot possess?”
The answer to his question is 48. Turn to 48.
48 Your answer is correct. As a reward the priest gives you one of the North Gate spell lines.
‘I bid you, portals, open wide.’
Restore your Luck score to its initial level (13).
165 Night is now approaching; ask the old woman the directions to the tavern. She tells you how to find The Wayfarers Rest.
110 You meet Flanker the Assassin again. Turn to 222.
222 Flanker has had some luck in the Gambling Halls of Vlada and gives you 5 Gold Pieces (62). He tells you to beware of the ale that is served here. One mug is refreshing, two will make you merry and three will put you out for the night. Flanker leaves the tavern with his pals.
110 A room for the night costs 4 Gold Pieces and a meal also costs 4 Gold Pieces. Buy both (54).
331 You eat your food; add 2 Stamina points (18). You talk to a sailor and he buys you a mug of ale, add 1 Stamina point (19). He tells you that to get one of the spell lines you have to kill the undead. He then offers to buy you another mug of ale. Accept his offer.
253 Add 2 Stamina points for the ale (21). He tells you that one of the spell holders is cursed with the living death. He also tells you that one of his friends was recently killed for daring to kiss the god Courga on the cheek. He offers to buy you another mug of ale. Decline his offer and say that you want to go and get some sleep.
86 You go to your room.
282 You rest in your room, do not eat any provisions.
DAY 8
227 You wake to find that your wrist is attached to a guillotine. To get out of the trap you must release the rope.
15 The blade rises. Add 1 Luck point for making the right choice (13). Also add 2 Stamina points for the sleep (23).
267 I did eat last night.
325 You cross the bridge over the river. You can now turn either left or right. Choose the right fork.
198 You come across a monument where people are around it with their eyes permanently closed. Take a closer look at the monument.
204 Ask one of the onlookers what the monument is.
116 They try to push you into the monument. Test your Luck. Rolled 7 (12).
290 You squirm out of their grasp. Cast the VIK spell option.
462 I was not expecting this to be a spell option.
397 You mention Vik to the Red-Eyes and they get scared and do not want a confrontation with Vik and decide to let you go.
135 You come to a street where you can visit the market or go to the Gambling Halls of Vlada or carry on straight ahead. Go to the market.
226 Buy 3 Provisions (5) for 9 Gold Pieces (43). Buy the tinderbox for 2 Gold Pieces (41).
162 You leave the market.
83 You pass a graveyard and see the crypt for Lord Shinva – Fifth Noble of Kharé. Check it out.
47 Enter the crypt. You see a shimmering pool of darkness ahead. Cast the SUS spell.
377 Deduct 2 Stamina points (21). The spell protects you from magical traps and you can enter the crypt safely.
249 The crypt is empty apart from a stone staircase. Go down the stairs.
164 You enter a chamber where there is a stone coffin in the centre. The lid moves and a ghostly white figure advances. Draw your weapon.
99 I am using a sword.
151 The creature is a Deathwraith (Skill 9, Stamina 8). When you inflict your first wound turn to 189.
Round 1
Death wraith (16) Stamina 6
Me (17) Stamina 21
189 The Deathwraith cannot be harmed by normal weapons.
Round 2
Death wraith (16) Stamina 8
Me (13) Stamina 19
Round 3
Death wraith (18) Stamina 6
Me (21) Stamina 19
Test your Luck. Rolled 7 (11). Turn to 38.
38 Deathwraiths can only be harmed by Silver Weapons. The only option you have is to call on Libra for help.
87 Libra appears and directs the Deathwraith to go back into the coffin.
209 A figure rises from the coffin. It is Lord Shinva, the fifth noble of Kharé. You ask him if he knows one of the spell lines. He does and says one of the lines as follows.
‘One lock made out of Golem’s hide.’
You ask if he knows any more information and tells you the following.
‘For sleeping of the Sleepless Ram;
Seek out the one they call the Sham.’
Add 2 Luck points for the encounter (13).
16 You leave the crypt.
127 Further on up the road you encounter a well. Ignore this and continue up the street.
319 You leave the centre of the city. Do not stop and eat provisions. You see a blind beggar. Toss him a Gold Piece (40).
285 The beggar thanks you. However he now gets attacked by two Harpies. Help the old man out.
97 Use your magic on the Harpies.
310 Cast the DIM spell.
473 Deduct 2 Stamina points (17). You must test your luck as the Harpies are moving about quickly. Rolled 12 (12). If lucky you confuse one Harpy and it will be no threat.
118 You now fight the Harpies. First Harpy (Skill 7, Stamina 6) – This has been neutralised from the DIM spell and the Second Harpy (Skill 6, Stamina 6). The Blind Beggar (Skill 2, Stamina 8) also fights.
Round 1
Harpy (12) Stamina 2 – Tested Luck (11)
Beggar (10) Stamina 6
Me (19) Stamina 17
Round 2
Harpy (13) Stamina 0
Beggar (13) Stamina 6
Me (20) Stamina 17
74 The beggar is still alive.
207 The beggar thanks you. He was the Seventh Noble of Kharé and he knows one of the North Gate spell lines.
‘By Courga’s grace and someone’s pride.’
He cannot remember which god is in the spell line but suggests that you check out the temple of Courga up ahead. However if you do you risk your life as you must kiss the statue correctly. He tells you that the left eye leads the way.
The beggar then gives you the Serpent Ring. To discover the power of the Serpent Ring start book three by turning to 130.
148 You head towards the North Gate. Ahead is the temple of Courga. Check it out.
73 You enter the temple. Investigate the Idol up ahead.
122 You step up to the Idol. There is a message above which enables you to speak to the God.
‘On Courga’s face you kiss a cross
And finish with the lips
For answers to your questions you
Must err not else me spits.’
You must try to kiss the statue to ask the God a question.
252 First kiss the left eye.
284 Then kiss the right eye.
78 Thirdly kiss the forehead.
52 Finally kiss the lips.
141 The statues eyes flip open. Ask the God the following question. ‘What is the name of the god of pride?’
101 The statue says that the God of Pride is called Fourga.
109 You leave the temple. You now need to come up with a plan to deal with the North Gate guards.
175 The guards tell you that the gate is closed. Cast a spell.
26 Cast the DUD spell.
475 Deduct 2 Stamina points (15). Cast the spell on the Copper Key (it is now lost). This transforms into fake treasure which you give to the guards.
271 You step up to the North Gate. You must recite the four spell lines in the correct order for the North Gates to open. Three numbers are hidden within the spell lines. Turn to the reference to see if you have recited the spell correctly.
‘So tumblers two sealed deep inside,
One lock made out of Golem’s hide,
By Courga’s grace and Fourga’s pride,
I bid you, portals, open wide.’
Turn to 214.
214 The North Gates creek open, allowing you to leave the city.
511 You step through the North Gates. Leave Kharé and head on into the Baklands.
BOOK 3 – THE SEVEN SERPENTS

Initial Skill = 9 (Current Skill = 9)
Initial Stamina = 24 (Current Stamina = 15)
Initial Luck = 13 (Current Luck = 11)
Equipment = Sword, Backpack, Locket, Bomba Apple, 2 Throwing Darts, Tinderbox, Bamboo Flute, Blimberry Juice, Vial of Glue, Nose Plugs, 4 Pebbles, Bone Bracelet, Sun Jewel, Gold-Backed Mirror, Gold Locket (worth 8 Gold Pieces) and Green Wig.
Gold = 40
Provisions = 5
130 When you confront the serpents use the ring to gain valuable information. Deduct 14 from the reference that you are on. All the serpent references will end in a three.
1 You start walking along the Baklands. After a while you get attacked by a group of four Nighthawks. Cast a spell.
178 Cast the LAW spell.
430 Deduct 4 Stamina points (11). You command the Nighthawks to fly back to Kharé. It works at first but they soon start to return when the spell has worn off.
314 The Nighthawks are about to attack again when a huge Goldcrest Eagle from Analand arrives and drives the Nighthawks off. The eagle lands and delivers the following message.
‘We trust these tidings reach you in fair heath, but must warn you of impending peril. Your mission is discovered!
The Mampang eyes have spied your plan and word is on its way to the dark fortress. Too late we discovered our unwelcome eavesdroppers and news of your quest is being carried towards High Xamen by Seven Serpents, the Archmage’s most trusted servants. By now they will divide to complete their journey separately.
If you are still able, seek them out, for they must stop to rest and eat. Destroy the creatures before they reach their goal, else the Archmage will prepare a deadly welcome for you.
Find Shadrack the Hermit for naught moves through the Baklands without his knowledge.
Our thoughts are with you.’
The eagle lifts off and you are able to continue.
48 You continue onwards until you encounter a tree. The tree transforms into the shape of an old man and gives you directions to find Shadrack the Hermit. Follow these directions.
150 You meet Shadrack. Eat a meal with him and add 2 Stamina points (13). He tells you that each of the Seven Serpents has a weakness. The Air Serpent will die if it cannot re-enter its body within minutes. You spend the night in Shadrack’s cave. Add 3 Stamina points (16). Before you leave he gives you a Galehorn. You leave by heading northwards.
DAY 9
85 As you head on up the plain, the ground rumbles underneath you and you fall. Test your Luck. Rolled 3 (10). No damage to any equipment. A Baddu-Beetle appears. Cast a spell.
191 Cast the SUN spell.
334 Deduct 1 Stamina point (15). You use the Sun Jewel to blind the Baddu-Beetle and it crawls back away allowing you to continue.
24 You collect some Stone Dust. Continue by heading North-East.
12 A dark-cowled creature approaches and beckons you to come forward. Approach him.
104 It appears to be a Deathwraith. Cast a spell.
310 Cast the MAG spell.
452 Deduct 2 Stamina points (13). The illusion is broken and instead of a Deathwraith a balding man is there instead. Spare his life.
72 He pleads for you to spare him. He gives you 9 Gold Pieces (49), a Chakram throwing disc (Roll under Skill before a fight which inflicts 2 Stamina points damage on your opponent.) and some Yellow Powder. He then sees something behind you which frightens him to death.
143 The sky goes black and the Moon Serpent appears. Turn to 129 to use the Serpent Ring.
129 The Moon Serpent says.
‘Four guards protect the Fortress of Mampang.’
143 Prepare to cast a spell.
96 Cast the HOT spell.
377 Deduct 4 Stamina points (9). You hit the Moon Serpent with the fireball and it kills the Serpent instantly.
62 As the Serpent dies it leaves behind a small Crystal Orb. Take this.
285 Continue on by heading North-West.
137 You come along to a caravan of wagons. Hold up your hands to show that you mean no harm.
259 They are a group of Black Elf traders of some kind. Claim that you are a trader too.
315 You are taken to see Oolooh who offers you anything from his catalogue. Buy the Vittles (Turn to 17), Brass Pendulum (Turn to 93) and the Pearl Ring (Turn to 124).
17 The Vittles contain enough food for 4 provisions (9). They cost 4 Gold Pieces (45).
93 The Brass Pendulum is useful for spells and costs 2 Gold Pieces (43).
124 The Pearl Ring is useful for spells and is also worth 10 Gold Pieces. It costs you 8 Gold Pieces (35).
86 You can now leave the caravan.
294 You leave the camp without any trouble.
269 Night is approaching, find a camp for the night.
237 Set up camp. Eat a provision (8) and add 2 Stamina points (13). You sleep for the night, add 1 Stamina point (14).
DAY 10
11 You are faced with a number of directions to continue. Head North-East.
73 You spot a small creature walking really fast. Check it out.
162 It is a small Gnome like creature. Tell it that you are a friend.
134 It demands that you give it a gift. Give it the Brass Pendulum.
50 Roll the dice, rolled 5. Turn to 290.
290 The gift is accepted. The Gnome transforms into a woman who calls herself Dintainta although she is also known as The Sham. She gives you a glass vial in order to defeat the Sleepless Ram in the Mampang Fortress. She also gives you her Staff of Oak Sapling. This enables you deduct 2 points from Skill when fighting any of the Seven Serpents. Add 2 Luck points (12).
114 You continue onwards, eat a provision here and gain 2 Stamina points (16). Continue by heading North.
283 The Baklands are now coming to an end. Do not eat any provisions here.
300 A rock explodes nearby and hits your leg; lose 1 Stamina point (15). Cast the WOK spell.
477 Deduct 1 Stamina point (14). Use a Gold Piece (34) to create a shield to protect you from the falling rocks. You do not lose any Stamina at 30.
30 Using your magical shield you avoid the rocks. However you slip and fall.
98 You land in a grave sized pit. Cast the DOC spell.
348 Deduct 1 Stamina point (13). You use the Blimberry Juice to restore your Stamina score to its initial level (24). Try and climb out of the pit.
211 You need to roll under your Skill score (Rolled 7). Now test your Luck, rolled 4 (11). You lose 1 Stamina point (23) but are able to climb out of the pit.
43 A green snake wraps around your ankle. Try to get rid of the snake.
263 The snake transforms into the Earth Serpent. Turn to 249 to use the Serpent Ring.
249 The Earth Serpent says.
‘Offer no gold to Valignya if you value your life!’
263 Cast the HUF spell.
351 Deduct 1 Stamina point (22). You use the Galehorn to create a burst of air which forces the Earth Serpent up into the air.
127 The Serpent shrinks back to the size of a snake; you grab it and finish it off.
220 You rest for a while before continuing on.
165 The Forrest of Snatta lies ahead. You rest awhile and then head over to the forest.
133 Night is approaching. Set up camp for the night.
55 You settle down to sleep.
DAY 11
235 Add 3 Stamina for the night’s rest (24). You head on into the forest. Continue by heading left.
13 Take the Sand. Leave behind the Stone Dust.
117 You see a red coloured snake. Follow the snake by leaving the path.
226 Follow the snake up to the tree and be ready for any danger.
123 The tree bursts into flame. Deduct 3 Stamina points (21) and 1 Skill point (8). The snake transforms into the Fire Serpent. Turn to 109 to use the Serpent Ring.
109 The Fire Serpent says.
‘Eat not from the larder of Throgg.’
123 Do not cast a spell but have something else in mind.
197 Use the Sand.
148 You throw the Sand onto the Fire Serpent which causes the flames to go out and the Serpent shrinks back to become the snake once more. You fight the snake (Skill 5, Stamina 6).
Round 1
Snake (16) Stamina 6
Me (15) Stamina 19
Round 2
Snake (17) Stamina 6
Me (13) Stamina 17
Round 3
Snake (12) Stamina 4
Me (14) Stamina 17
Round 4
Snake (14) Stamina 4
Me (10) Stamina 15
Round 5
Snake (14) Stamina 2
Me (18) Stamina 15
Round 6
Snake (13) Stamina 0
Me (16) Stamina 15
306 You come to a fork ahead. Take the right hand path.
214 You follow the trail. Stop here and eat a provision (6) and add 2 Stamina points (17). You hear a strange sound, investigate it.
193 An invisible creature attacks you. Deduct 2 Stamina points (15). Try and find out more about your attacker.
90 You see the beast for a few seconds before it concentrates and disappears again. The creature walks away, allowing you to continue on your way.
25 A bit further on you encounter at least a dozen Snattacats. Cast the FAR spell.
423 Deduct 1 Stamina point (14). You use the Crystal Orb to find out where the Snattacats are going to attack. With this knowledge you can avoid them and can continue onwards.
271 You soon reach a fork. Take the left hand path.
119 You encounter a doorway set into the hillside. Creep up to the door.
171 Open the door.
265 You can hear voices inside. Creep along the path to see what is happening.
190 You see a spindly creature looking into a glass orb. Announce yourself to the creature.
282 She introduces herself as Fenestra, Elf Sorceress. Ask if she can help you with your magic.
234 She is glad to meet a fellow magic-user. She allows you to have any spell artefact in exchange for two spell artefacts that you currently possess. Exchange the Yellow Powder and the Pearl Ring for a Medicinal Potion.
183 Fenestra tells you about the Seven Serpents and her quest to gain revenge on the Water Serpent. She gives you a Flask of Oil to use as oil is the Water Serpent’s weakness. She then shows you that she has imprisoned the Sun Serpent in her Crystal Orb and allows you to talk to it. Turn to 169 to use the Serpent Ring.
169 The Sun Serpent says.
‘Beware the breath of the Mucalytics.’
183 Ask Fenestra how to cross Lake Ilklala.
132 She offers t o sell you the Ferryman’s Whistle for 2 Gold Pieces. Buy this item (33).
324 Before you leave Fenestra gives you a gift. Choose to take the Lucky Charm. Turn to 221 to find out about the Ferryman’s Whistle and 195 to find out about the Lucky Charm.
221 The whistle will call the Ferryman. Turn to 199 when you reach the shore of Lake Ilklala. Add 3 Luck points (13).
195 The Lucky Charm can be used once to restore your Luck score to initial level. The charm itself is worth 1 Gold Piece.
92 You leave Fenestra. Take the centre path to continue.
146 You reach a place where you can rest and eat provisions. Do not eat here.
20 You reach the shore of Lake Ilklala. Set up camp for the night.
DAY 12
264 You awake early. Turn to 199 to use the Ferryman’s Whistle to summon him.
199 You summon the Ferryman. Pay the 4 Gold Piece fees (29).
110 The Ferryman starts your journey across the lake but he stops and demands that you row him across instead. Complain and tell him that it is his job to row you across.
223 The Ferryman transforms into the Air Serpent. Turn to 209 to use the Serpent Ring.
209 The Air Serpent says.
‘In the dark chamber of night, do not light your way with the Blood Candle.’
223 Investigate the body of the Ferryman.
21 You find the shrivelled skin of the Air Serpents body. Rip the skin apart.
34 With the skin broken the Air Serpent cannot return to its body and it finally disperses into thin air.
213 You continue to row yourself across the lake. You see some water bubbling up ahead. Investigate this.
28 Test your Luck. Rolled 2 (12). This avoids you being thrown overboard.
118 You manage to hold onto the boat.
303 The Water Serpent rises from the lake. Turn to 289 to use the Serpent Ring.
289 The Water Serpent says.
‘Pay respect to Naggamanteh the Torture Master.’
303 Decide to fight the Water Serpent another way.
172 Look through your backpack.
245 Use the Flask of Oil.
14 You throw the Flask of Oil hitting the Water Serpent. The oil comes into contact with the Water Serpent which kills it.
75 You rest a while before proceeding. You near the opposite shore.
147 Test your Luck. Rolled 6 (11).
182 You step out onto the Vischlami Swamp. Stop here and eat a provision (5). Add 2 Stamina points (16). You spot a group of creatures ahead. See what happens next.
316 The creatures are Marsh Goblins. They are speaking in a strange language that you do not understand. Cast the RAP spell.
396 Deduct 1 Stamina point (15). You use the Green Wig t o talk to the Marsh Goblins.
410 They tell you that they have been given a Spell Scroll to defeat the Serpent of Time but they do not understand how to use it. There is a reference number on it which is the Roman numeral of LIX (59). When you encounter the Serpent of Time, turn to reference 59.
295 You encounter a snake-like creature in the grasses. Attempt to cast a spell.
53 The snake transforms into the Serpent of Time but it is moving too quickly to cast a spell. Turn to 39 to use the Serpent Ring.
39 The Serpent of Time says.
‘The Archmage is not as he seems in Mampang. He may be disguised.’
53 Turn to 59 to use the Spell Scroll.
59 You read out the spell chant and the Serpent starts to slow down, allowing you to attack it with your weapon. The Serpent of Time (Skill 3, Stamina 14), you can use the Staff of Oak Sapling to deduct 2 points from the Serpents Skill score (Skill 1, Stamina 14).
Round 1
Serpent (7) Stamina 12
Me (14) Stamina 15
Round 2
Serpent (11) Stamina 10
Me (17) Stamina 15
Round 3
Serpent (8) Stamina 8
Me (12) Stamina 15
Round 4
Serpent (8) Stamina 6
Me (19) Stamina 15
Round 5
Serpent (6) Stamina 4
Me (15) Stamina 15
Round 6
Serpent (7) Stamina 2
Me (17) Stamina 15
Round 7
Serpent (4) Stamina 0
Me (17) Stamina 15
4 After a brief rest you continue onwards.
393 You stand at the Zanzunu Foothills. All of the Seven Serpents have been either trapped or defeated.
357 You have defeated all the Seven Serpents. Start book four at reference 237 instead of 1. Increase your Skill score to 2 points above your initial score (11). Increase your Stamina score to its initial level (24) and you may increase your Luck score to one point above your initial level (14).
498 You head off into the Low Xamen.
BOOK 4 – THE CROWN OF KINGS

Initial Skill = 11 (Current Skill = 11)
Initial Stamina = 24 (Current Stamina = 24)
Initial Luck = 14 (Current Luck = 14)
Equipment = Sword, Backpack, 2 Throwing Darts, Tinderbox, Locket, Glass Vial, Chakram, Ferryman’s Whistle, Bamboo Pipe, Vial of Glue, Nose Plugs, 4 Pebbles, Bone Bracelet, Sun Jewel, Gold-Backed Mirror, Gale horn, Medicinal Potion, Crystal Orb, Green Wig, Staff of Oak Sapling, Gold Locket (Worth 8 Gold Pieces) and Lucky Charm (Worth 1 Gold Piece).
Gold = 29
Provisions = 5
237 As the Seven Serpents have been defeated no news of your mission has reached the Archmage at Mampang. Any creature that recognises you as ‘The Analander’ deduct 40 from the reference that you are on and turn to this new section.
1 You travel through the Low Xamen and encounter three caves. Go into the Largest or the far cave.
534 There is a creature inside. Call out and try and attract its attention.
309 There is no reaction to your call.
62 The creature is dead. Stay here for the night.
293 You sleep in the cave. Do not eat as you have already eaten today.
DAY 13
384 Add 2 Stamina points for the nights rest (24). You continue and climb into the foothills. Take the right hand path.
339 You encounter two human/goat hybrid creatures that look just like the dead creature you found in the cave last night. Turn to 378.
378 Tell the creatures about their dead comrade.
413 The dead creature’s name was Sh’Himbli and had a bad fever. They invite you to their village.
545 The creatures are called She-Satyrs and you are introduced to their chief called Sh’Houri. Tell the chief about your travels.
371 You tell your story. Sh’Houri then tells you that if you go to Mampang you must find your way past the four Throben doors which are all deadly. She gives you a Hardwood Spear. She also encourages you to find Colletus the holy man who can bless the spear. If you think that you can find Colletus then deduct 30 from the reference that you are on.
435 You have an option to exchange spell artefacts.
441 You leave the She-Satyr village. Rest for a moment and take provisions.
350 You spot a message written on an alcove.
‘Head this warning! Proceed no further towards the curse that is Mampang. Every step you take in its direction takes you one step nearer eternal damnation. For I Colletus, have been there and back and know the truth of its ways. If you do not turn back, you may find me at the Groaning Bridge. You must save your own soul before it is too late.’
‘Colletus’
Eat a provision (4) and add 2 Stamina points (24).
539 You follow a path. Continue on straight ahead.
59 You encounter a giant crevasse. A short while on you see the Groaning Bridge, try and cross this bridge.
183 This is the Groaning Bridge, deduct 30 from the reference and turn to 153.
153 You find Colletus. Ask him if he has powers of healing.
78 Colletus asks if you spent the night in the cave with the dead goat woman.
24 He tells you that you have contracted the Trembling Disease but he offers to cure you of it. Colletus cures you of the disease. Next ask his help as a holy man.
283 Ask him if he will bless your Hardwood Spear.
204 Colletus blesses the Hardwood Spear for you. Finally ask him about the Mampang Fortress.
103 He tries to persuade you to not go to Mampang. He shows you how to cross the Groaning Bridge and gives you a Medicinal Potion, a Vial of Holy Water and a Skullcap. Increase your initial Luck score by 1 point (15).
411 You cross the Groaning Bridge which takes you to the outskirts of Mampang Fortress. The fortress looks foreboding and you must deduct 1 Skill point until you are safely inside the fortress (10). Creep forwards cautiously, looking out for any guards as you go along.
139 You see a guard sleeping. Test your Luck, rolled 11 (13).
342 You creep past. You prepare to bed down for the night. Do not eat provisions here as you have already eaten. I am still faithful to the goddess Libra.
439 Libra appears to you to tell you that she cannot help once you are inside Mampang Fortress. She does tell you however that there is a secret passage that you will need to pass through in the fortress and she knows the password to gain access. To use the password, deduct 92 from the reference that you are on at the time.
147 Libra then goes on to tell you about the Trembling Disease but you can ignore this as Colletus the holy man has already cured you of it.
247 She then tells you the effects of the disease but again you can ignore this as you have already been cured by Colletus.
DAY 14
113 Add 2 Stamina points for the night’s rest (24). You approach the main door to Mampang. Knock on the door to attract the attention of the guards.
304 You knock on the door and hide above it. One guard appears at the door. Wait and see what happens next.
496 A second guard appears. Wait and see what happens next.
364 A third guard appears. Wait and see what happens next.
432 A fourth guard appears. Now drop to the ground and sneak inside the fortress.
572 You have entered Mampang Fortress. Add the 1 Skill point back (11).
129 You come to a fork in the path. Ignore the large double doors and take the right hand path.
493 You hear the guard’s voices in the room. Continue to listen at the doorway.
330 You hear a guard approach the door, wait until he is close then smash the door open.
446 As the door smashes open it hits the first guard injuring him (Deduct 3 points from his Skill score). You also have the element of surprise. If your attack strengths are equal then you can count that you have won the round. You fight the guards (Skill 5, Stamina 6 and Skill 7, Stamina 7).
Round 1
First Guard (8) Stamina 4
Second Guard (16) Stamina 7
Me (18) Stamina 24
Round 2
First Guard (12) Stamina 2
Second Guard (13) Stamina 7
Me (17) Stamina 24
Round 3
First Guard (17) Stamina 0
Second Guard (18) Stamina 7
Me (19) Stamina 24
Round 4
Second Guard (13) Stamina 5
Me (18) Stamina 24
Round 5
Second Guard (14) Stamina 3
Me (18) Stamina 24
Round 6
Second Guard (13) Stamina 1
Me (20) Stamina 24
Round 7
Second Guard (15) Stamina 0
Me (20) Stamina 24
44 You find a large key on a ring. You take this key and use it on the large double doors outside this room. The key works and you step through the first Throben Door.
467 You walk into a large courtyard. You head on left towards a group of creatures.
109 You approach a group of Red-Eyes. Approach them.
242 Tell the Red-Eyes that you are from Kharé.
149 They test you by asking what the name of the holy man of Slangg is. Tell them that you do not know what his name is.
457 The answer is correct as nobody knows what his true name is. You excuse yourself and continue.
425 A bit further on you find a large bundle of rags lying on the ground. Investigate this.
233 The bundle of rags is in fact an old beggar woman. Toss her a Gold Piece (28).
61 The woman is very grateful and tells you that her name is Javinne. She speaks of the god cursed mongrels who would take away her money and then accidently speaks of her friends from Schinn. Ask her about these friends of hers.
372 She calls these people the Samaritans. Allow her to rest her hands on your face.
353 Javinne is able to tell that you are a good person.
436 She tells you of the Birdmen from Schinn who are trying to plot against the Archmage and overthrow him. Javinne says that if you talk to any of the Mampang Birdmen to ask them about their families. Loyalist Birdmen will talk of their fathers where the Samaritan Birdmen will worship their mothers. Add 2 Luck points (15). Now ask how she became to be the beggar woman that she is now.
388 Javinne tells you her story about how she became blind when she had an encounter with the Mucalytics. Next ask her about these tormentors that she spoke about before.
302 She tells you about the Sight-Monsters. They have tormented her ever since she was rendered blind by the Mucalytics. Offer to rid Javinne of these tormentors.
27 Once you have encountered and killed all three of the Sight-Masters deduct 100 from the reference that you are on. This will be the reference after you search their belongings.
8 Head over to the right to a group of creatures that look familiar.
325 You encounter the Sight-Masters. Approach them.
568 Deduct 40 from the ‘Analander’ reference. Turn to 528.
528 The Sight-Masters offer to give you some advice for 3 Gold Pieces.
459 You pay them the 3 Gold Pieces (25). They see that you have more than 5 Gold Pieces and become very interested in you.
45 Seeing that you are wealthy the approach to attack you.
90 The Sight-Masters draw their swords and advance. Use the Blessed Hardwood Spear.
313 You are able to kill all three of the Sight-Masters easily.
340 You search the bodies and find 23 Gold Pieces (48). You also find some Sand, Vial of Glue, Ring of Green Metal and 3 Provisions (8). Now deduct 100 from this reference and turn to 240.
240 You return to Javinne. She is delighted that you have taken care of her tormentors. As a reward she gives to you a Lucky Pendant. Increase your initial Luck by 1 point (16) and raise your Luck score to this level (16). She tells you that to get through the second Throben Door you must find the correct password. She does not know the password but knows that it is known by Valignya. However to get to him you must first get passed the Mucalytics.
135 On the far side of the courtyard, investigate the door in the corner of the wall.
519 You open the door and encounter a small stocky creature who asks if you have come to torment the Mucalytics. Take the left hand door.
18 Inside the room is a bulky creature with blubbery skin. Try and rush towards one of the other doors.
515 The creature lumbers towards you. Cast the NIF spell.
665 Deduct 1 Stamina point (23). You put on the Nose Plugs and the room fills with an awful smell. It is so bad that it kills the creature.
443 A search of the room contains a Rusty Sword (-1 Skill if used in combat), a Bone Bracelet, 2 Goblin Teeth and 5 Gold Pieces (53).
547 You try one of the doors; it is locked so you try the other one.
263 There are two rooms; one has a message which says ‘Enter only those who will pay the price.’ The other appears to be empty. First go into the empty room.
167 Do not bother eating any Provisions; however you have encountered Shadrack before.
77 You encounter the ghostly form of Shadrack the Hermit. He tells you that the Archmage’s people have caught him and interrogated him about your mission. He was forced to tell them what he knew but his spirit has been sent to you much faster than their horses. He tells you that to get past the Second Throben Door you will need to seek out Valignya the Miser. Naggamanteh the torture-master knows the secret to the Third Throben Door but Shadrack does not know the secret to the Fourth. Shadrack also advises you to seek out the Samaritans of Schinn as they also seek an end to the Arch mages’ power. You vow to revenge the murder of the hermit. Continue by heading for the room with the message over it.
428 Inside the room is a fat man. He has a large Jaguar as a pet underneath his desk. He says that the price to enter his room is 1 Gold Piece. Do not pay but ask him for his name.
42 He tells you that he is Valignya. Do not give him any money.
132 Insist that you will not give him any gold.
160 Now draw your weapon and attack him.
205 The threat works. You demand to know how to get through to the inner keep.
276 Valignya tells you that you need the correct password to get through the second Throben Door. The password is ‘Alaralatanalara.’ As you leave Valignya you steal a pouch containing 10 Gold Pieces (63). Add 2 Luck points for the encounter (16).
141 Deduct 40 from the ‘Analander’ reference and turn to 101.
101 The short stocky creature is no longer there. You approach the large double doors.
392 You step up to the doors. Open the doors with the password.
498 Say ‘Alaralatanalara’.
32 The second Throben Doors open and you enter the inner keep of Mampang Fortress.
538 Head on left towards the two Birdmen.
565 You hear the Birdmen approach, head towards the nearest left hand door.
161 Inside the room are three more Birdmen. Start up a conversation with them.
9 Ask the Birdmen about their families.
200 They say that their blessed mothers are well. Continue on with the conversation.
429 Tell the Birdmen that you are from Analand.
578 Tell them that you are interested in finding the Crown of Kings.
82 The Birdmen pronounce you as a friend. The leader is Pewit Croo of the Samaritans. He tells you that they want to overthrow the Archmage. Pewit Croo gives you a Silver Whistle which you can use to call him for his help later on in your adventure. Add 2 Luck points for this encounter (16).
479 You leave the Birdmen and reach a T-Junction. Go towards the metal door on the left.
6 The door is locked. I do not have the key to open the door so must knock on it instead.
178 A voice bids you to come inside. The door is trapped, test your Luck, rolled 6 (15).
190 You miss the full impact of the trap but must deduct 1 Stamina point (22).
251 You are in a torture chamber. Deduct 40 from the ‘Analander’ reference and turn to 211.
211 The creature introduces himself as Naggamanteh. Accept his offer to help you.
361 Compliment Naggamanteh on his fine torture chamber.
215 He is really happy that you like his torture chamber. He tells you that the third Throben Door has an illusion of fire on it. You can turn to 399 instead of the normal reference as you now know how to defeat the illusion.
230 You leave the torture chamber and take the left door.
236 Go to Nylock the Merchant.
91 Ask to purchase some of his wares.
494 Buy the Candles (turn to 303) and the Spell Artefacts (turn to 226).
303 The Candles cost 2 Gold Pieces (61). One is a normal candle and the other is blood red.
473 Now buy the Spell Artefacts.
226 Buy the Jewel of Gold, Yellow Powder and the Jewel-Studded Medallion for 10 Gold Pieces (51).
473 You leave the Merchant.
310 You follow the passage onwards.
124 You enter a large hallway. Head onwards to the large double doors.
41 The doors roar with flames. Turn to 399 to dispel the illusion.
399 You walk through the third Throben Doors, ignoring the flames.
150 You enter a room called ‘The Chamber of Night’. Use a candle to light the way.
13 Use the ordinary candle.
72 Start by turning to 87.
87 Then turn to 488.
488 Finally turn to 52.
52 You find the opposite door to escape from the chamber.
33 Straight away you are captured by the guards and are taken to Cartoum, Captain of the Guards. Speak with him to see what he has to say.
508 Deduct 40 from the ‘Analander’ reference and turn to 468.
468 Check out the illustration on section 375. The portrait on the wall is the same girl as the Locket that you found in the Pilfer Grass during your journey through the Shamutanti Hills. Offer the Captain something from your pack.
232 Give him the Locket.
290 The Captain is delighted to have his Locket back. To reward you he sets you free and gives you a key with the number 17 on it. You can use this key to get through the fourth Throben Door by deducting 17 from the reference that you are on at the time when you reach the door.
463 You leave the Captain’s room.
580 The next room contains a statue of a Ram. Walk across the room to the large double doors.
504 The statue comes to life and runs towards you. Test your luck, rolled 2 (14).
329 The Sleepless Ram misses you but it turns to face you yet again.
58 Try to use something in your pack to stop it.
152 Use the Glass Vial of Clear Liquid.
92 I came by this vial by meeting a woman.
241 You throw the vial at the Ram; the glass breaks and releases the gas inside. This has the effect of slowing the Ram down.
224 You run to the double doors, the Ram is speeding up once more and is heading towards you. Deduct 17 from this reference and turn to 207.
207 You use the key to open the fourth Throben Door and manage to shut the doors just as the Ram was about to hit you. You walk up a set of spiral stairs and reach a door. You open the door.
321 Inside the room is a balding man hiding behind the door. He is about to attack you, try and calm him down.
7 He eventually calms down and you talk to him.
79 He tells you that his name is Farren Whyde. He tells you that he Archmage is located in a hidden tower. Farren then uses some magic to make the tower appear. Ask his advice as to how is the best way to reach the tower.
245 Farren Whyde tells you that there is a wall protected by a password. However he does not know the password to get through. Investigate the wall.
546 You feel the stone wall. Deduct 92 from this reference to speak the password. Turn to 454.
454 The password works. You go through the secret passageway and head to the hidden tower. You must roll under your Skill score to open the tower’s door, rolled 6.
102 You open the door. Take the right hand passage.
465 Head across this new room and go towards the staircase.
381 As you head across the room your footsteps set off a trap.
284 The floor begins to rise up towards the ceiling. Search the floor for anything that might help to stop the trap.
168 You are unable to find anything useful. You decide to see if you have anything in your pack that might help.
16 You have nothing in your pack that will not help. Do not use your weapon as a wedge or it will break. Do nothing and wait and see what happens next.
269 At the very last moment, the trap is released allowing you to get up.
561 Deduct 40 from the ‘Analander’ reference and turn to 521.
521 Your mission has now been revealed to the Archmage. Turn back to 561.
561 You appear before the Archmage. Ask him to give to you the Crown of Kings.
138 The Crown appears before him in his hands. Do not give him your weapon. Cast the MAG spell.
687 Deduct 2 Stamina points (20). You are protected from the Archmage’s magic.
552 The Archmage calls for his guards to arrest you. You are taken away as a prisoner.
4 You are thrown into a prison cell. In here you meet Jann the Minimite who is also a prisoner of the Archmage. Tell Jann the story told to you from Farren Whyde.
69 You tell Jann the story. He tells you that Farren Whyde is actually the Archmage in disguise. Now that you know this deduct 111 from the reference that you are at if you meet Farren Whyde again.
98 Ask Jann his opinion as to how to get out of the prison cell.
414 Tell Jann that you want to consider casting a spell to get out.
337 Jann tells you that only the most powerful spells can be used in his vicinity. Since you have more than 8 Stamina points left turn to 356.
356 Tell Jann that you know the ZED spell.
374 Jann then proceeds to tell you the history and background to the ZED spell.
402 Now that you know what the ZED spell can do and how to cast it turn to 631 when you cast the ZED spell instead of the reference given to you on the section.
427 Deduct 7 Stamina points (13). You cast the ZED spell. Turn to 631.
631 The spell works and you are transported back in time and appear once more in Farren Whyde’s room.
321 You see Farren Whyde once more, deduct 111 from this reference and turn to 210.
210 Farren is impressed that you have uncovered his little secret. He then shows you that he has the Crown of Kings but then starts to transform into a Netherworld Demon. Cast the ZAP spell.
683 Deduct 4 Stamina points (9). You cast the spell before the Demon can fully form, its head explodes.
351 You take the Crown of Kings. Look in your pack for something to use next.
148 Use the Silver Whistle to summon Pewit Croo.
800 Pewit Croo then flies you from the Fortress at Mampang back to your home at Analand. You have retrieved the Crown of Kings and have successfully completed your mission.
The End!!